Autonomous Coaxial Helicopter - Stage 1
Using the Double Horse 9053 Volitation (Revell “Big One Pro”) I wrote about earlier, I've now embarked on a project to make it an autonomous flying and stabilizing helicopter. (First let me have a rant at the term "Unmanned Aerial Vehicle" which is being thrown around. For model RC vehicles of any kind, it goes without saying that it is unmanned. Not even if a midget would fit in your model plane would you put him in there! So, UAV is a redundant non-descriptive term for most model aircraft. On the other hand, autonomous aerial vehicle would be a better term for what most hobbyists are trying to archive with "drones"). With that out of the way, let's look at the technical details, and what lessons to take away so far.
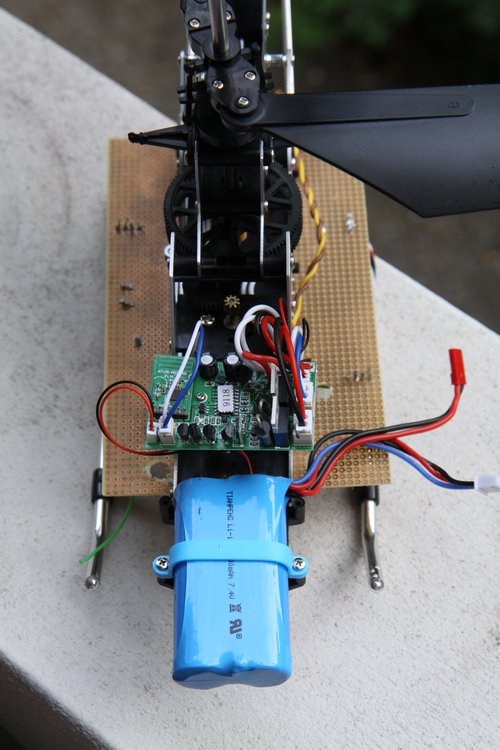
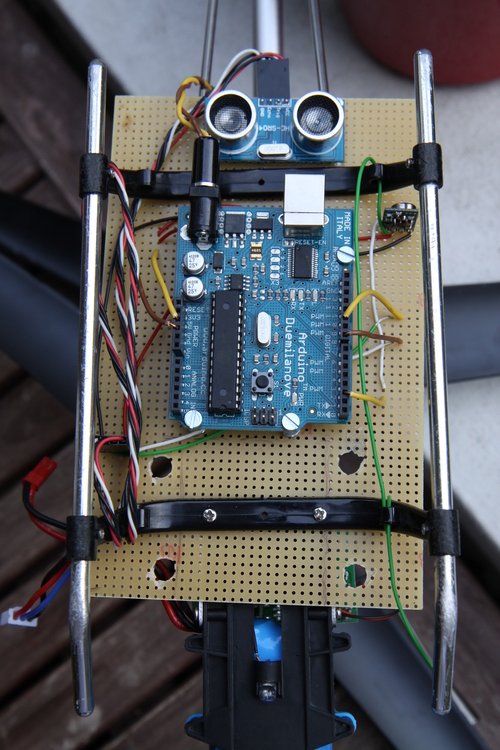
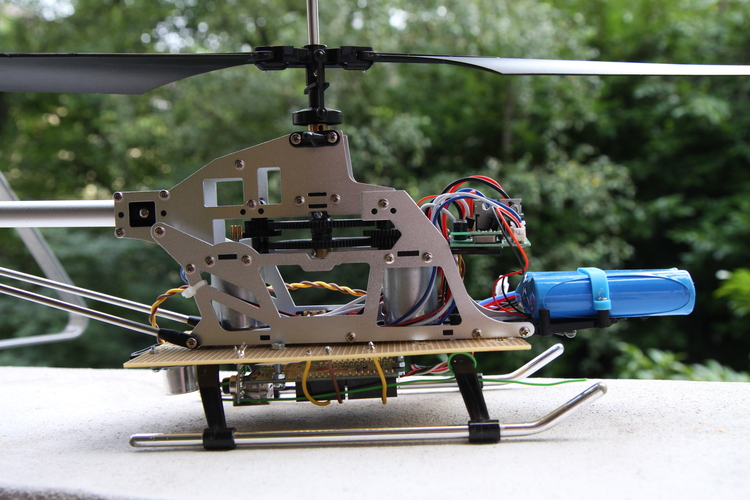
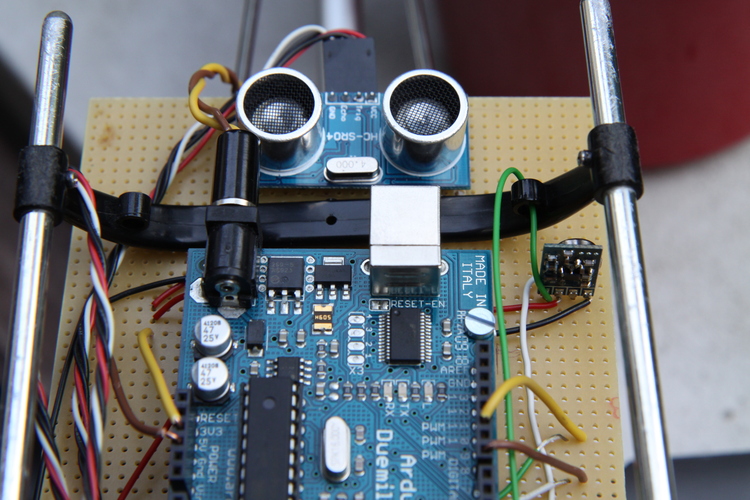
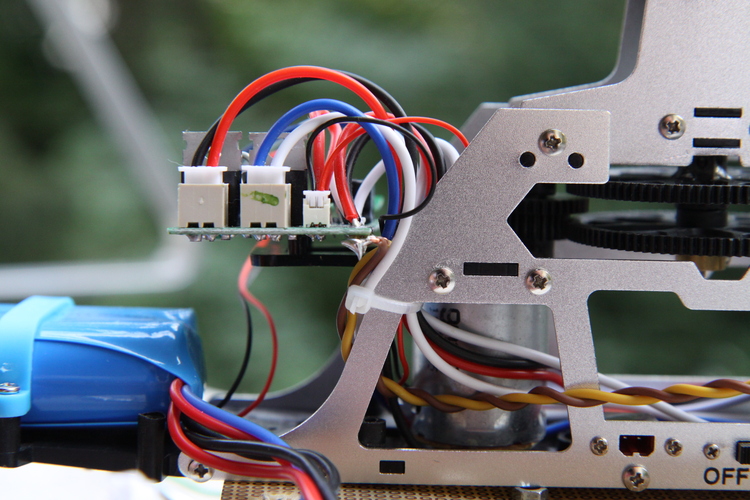
The first step involves the Ultrasonic Range Finder I just got, pointing downwards to give hight information. To more easily mount that, and the Arudino, I put a whole blank PCB between the landing skids and helicopter body, as seen in the pictures above. Now, it doesn't look pretty, and is adding unnecessary weight, but this is just a prototype so far. The PCB made it easy to route and solder a few extra wires, and also add a radio transmitter: The 433.92 MHz transmitter I got a while back, seen to the right in the close-up picture below.
Although the Double Horse 9053 Volitation is a medium to big coaxial model helicopter, it does not have much extra lift power. When loaded with the essential parts already mentioned, plus an extra LiPo battery to power it all, it would barely take off, and then just bounce along the ground. First lesson learnt; an extra battery is a no-go, so I would have to share power with the helicopter RC system and motors. That's a 2 cell 7.4 V LiPo, so works for the Arduino, but hopefully I'll be able to move to a 3 cell 11.1 V at some point. So far I've just soldered an extra wire onto the original helicopter board (right hand picture above). Long term, I'm planning to replace that board entirely. That should put the balancing right again, as now the whole setup got tail-heavy, and it's actually difficult to pitch down.
Once the Arudino, range finder and radio link was mounted, I started programming everything. At this point, it wasn't much code required, but it revealed a new point: When the Virtual Wire library is used to transmit the height information, it interferes with the reading from the range sensor. The VW library works with an interrupt routine, so maybe I could untangle it by avoiding the interrupt. The interesting bit is that the reading from the range sensor decreases the recorded distance. Intuitively, one would maybe have expected that the added delay from the interrupt would have caused the echo timing to be prolonged, whoever the opposite happens. With only the range sensor library active, I started with a distance of about 196 cm. That went down to ~166 cm once the vw_setup() routine was activated, and further down to ~155 cm once the vw_send() was used. Finally, the setup of the VW somehow obscured the pin mode setting from the Ultrasonic library, thus I had to re-set the in/out pins for the range finder after the vw_setup() call.
On the receiving end, I simply used a second Arduino, loaded with the VW Receiver example sketch. An obvious draw-back with this setup is that communication is one-way. The next step will probably be with something like the Xbee modules, which will hopefully speed up transmission as well.
#include "Ultrasonic.h"

#include <VirtualWire.h>


Ultrasonic ultrasonic(8,10);


void setup() {

  vw_setup(2000);	 // Bits per sec

  vw_set_tx_pin(2);


  // Re-set the pins for the range sensor

  pinMode(8, OUTPUT);

  pinMode(10, INPUT);

}


void loop() {

  long cm = ultrasonic.Ranging(CM);


  // Ignore invalid range readings

  if (cm > 2000) {

  return;

  }


  char msg[5];

  ltoa(cm, msg, 10);


  vw_send((uint8_t *)msg, strlen(msg));

  vw_wait_tx();


  delay(200);

}
