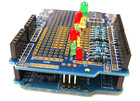
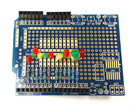
DIY Arduino Debug Shield
Debugging with LEDs; it's probably even more primitive than debugging with printf statements. However, to get a very immediate feedback on what's happening, or which pins are in use, it can be useful. So what better way then than a ~$2 homemade shield to pop on top of your existing project.
DealExtreme supplies all the parts needed: A versatile prototyping shield board with holes and wires in sensible locations; a bag of assorted LEDs; resistors; and header pins. (The board and headers in this project used 6x and 8x header pins, to fit with the older Duemilanove. The Uno another other boards have slightly different pin layouts, so plan ahead).
Now, I'm not an expert at soldering, nor product design, but this shield does the job, and already helped in programming my next project. Lesson learnt: Lay out the components all the way before heading off with the iron. I should have gone with the 3mm LEDs all the way. Or, maybe surface mount could have worked. Next time.


