QNAP NAS and autofs auto mount
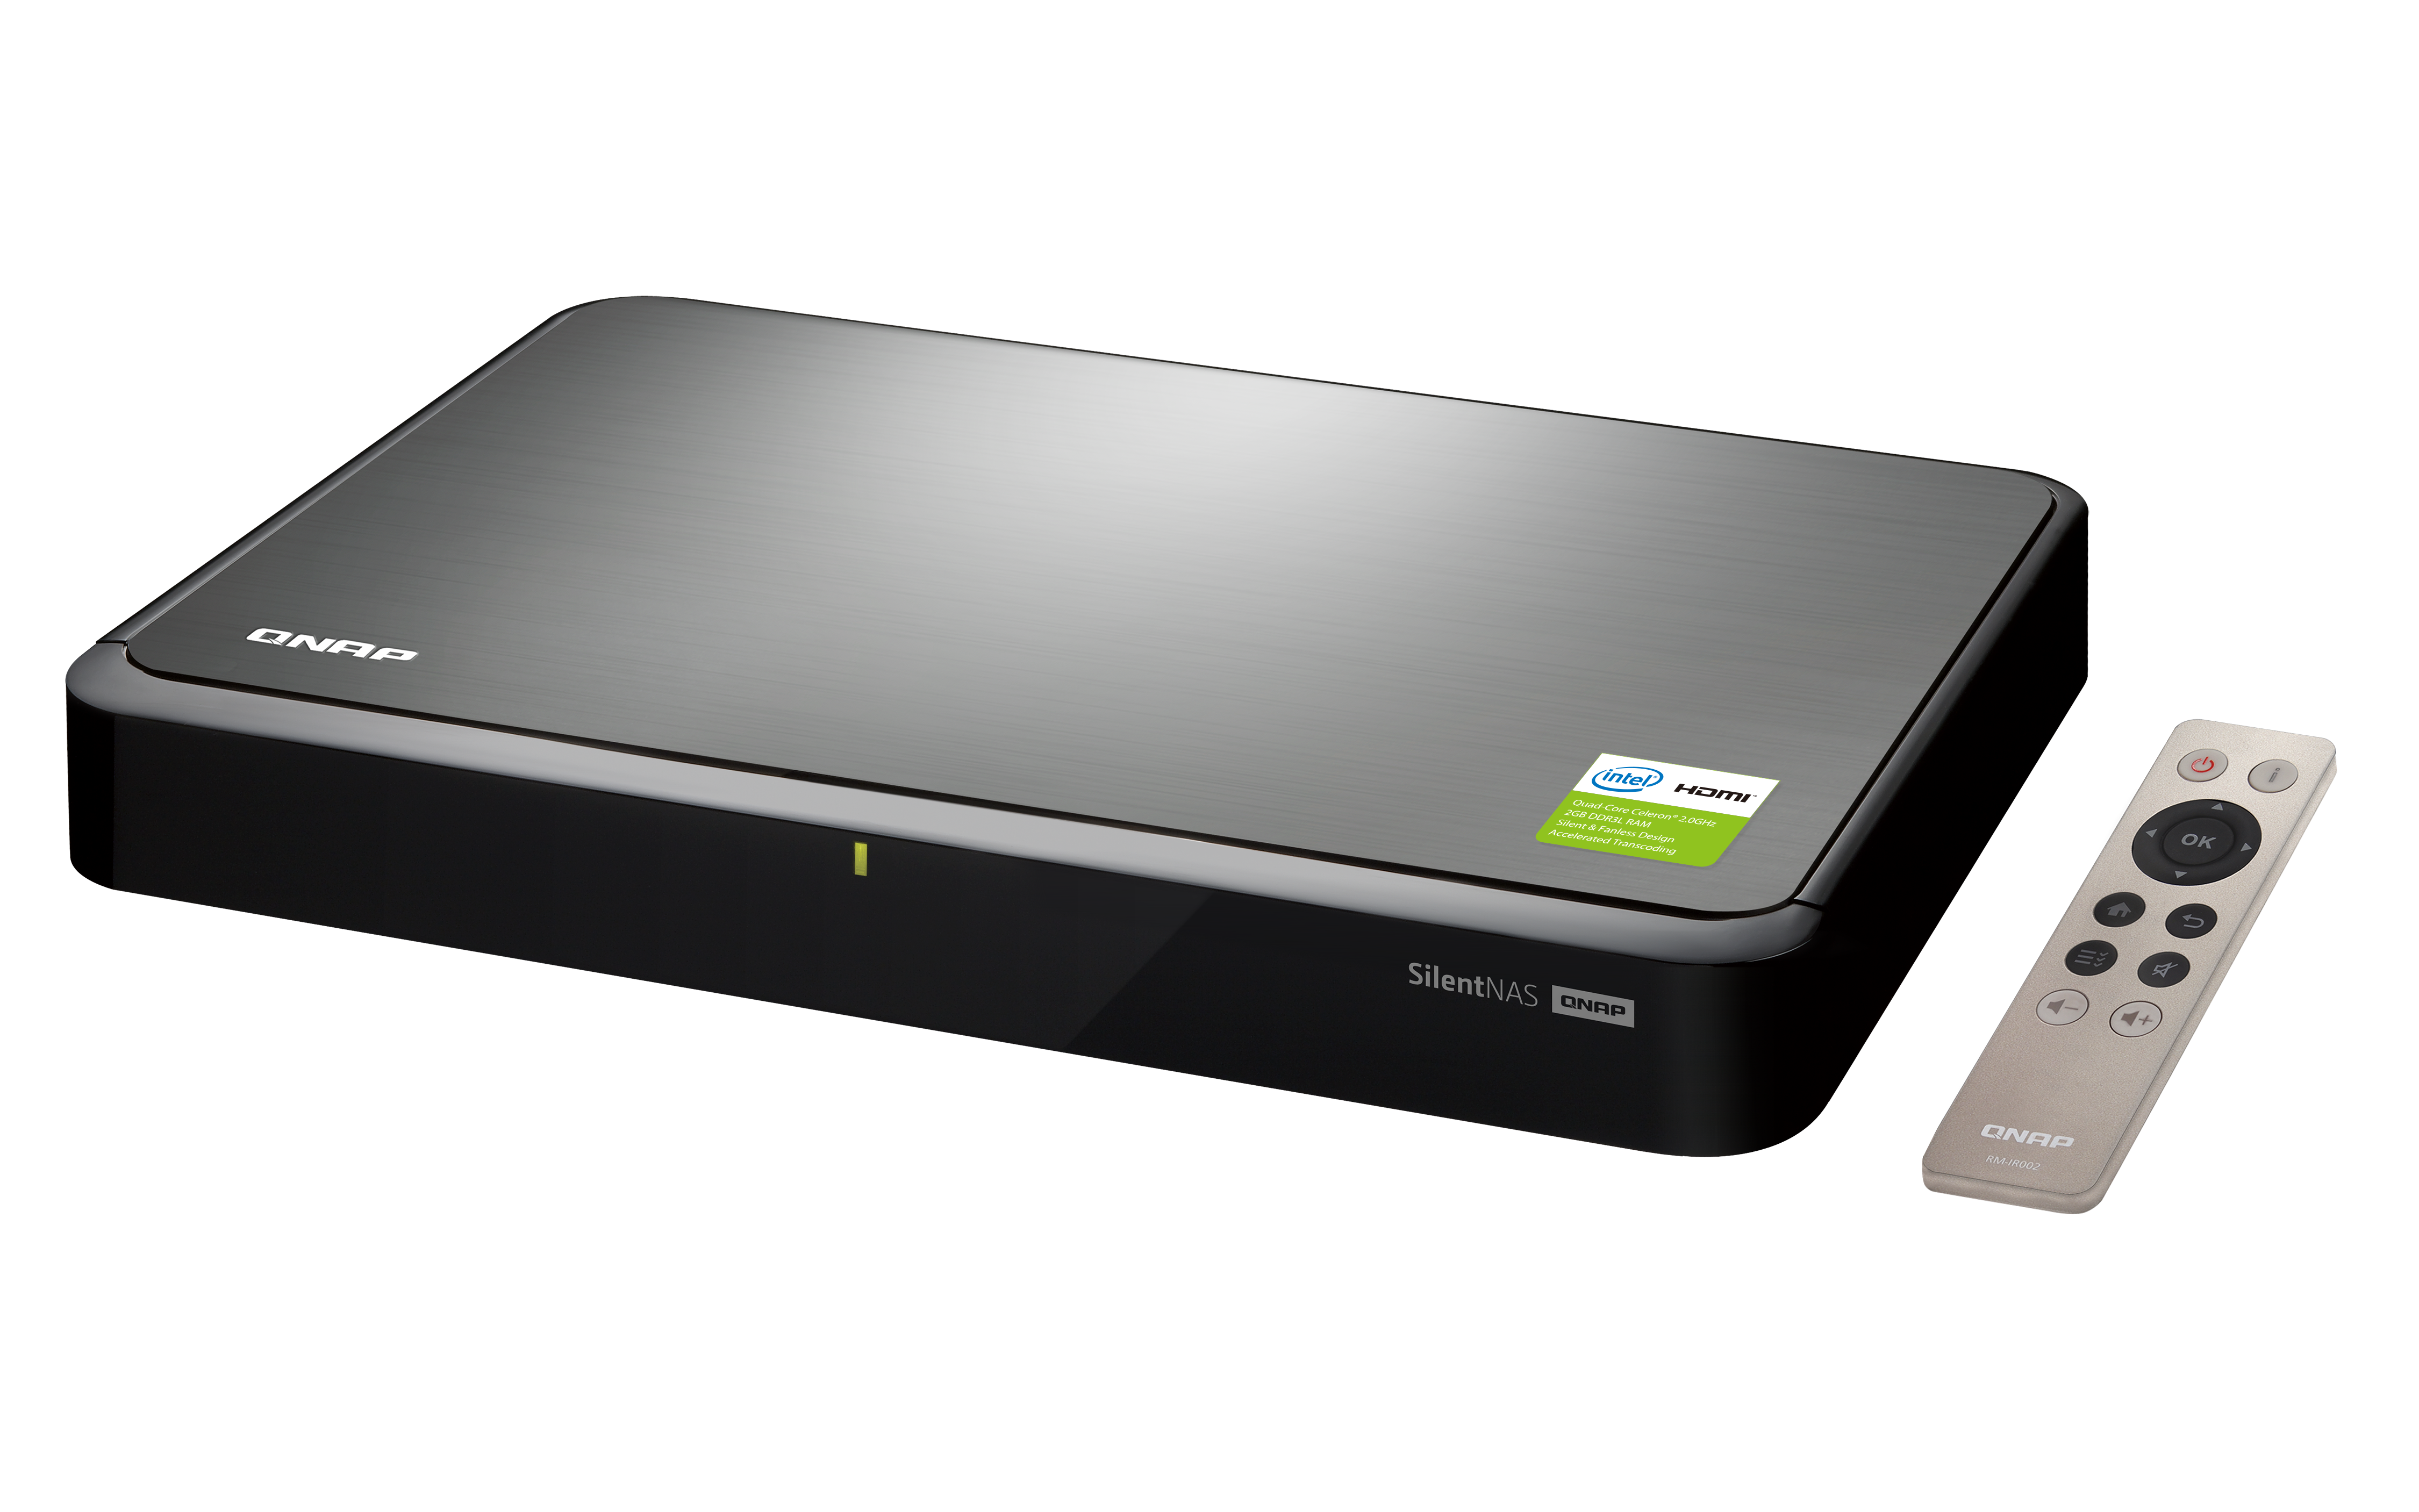
After considering multiple options to cover a HTPC and a NAS, I finally went with the combined "living room" QNAP HS-251+ NAS earlier this year. I'll leave the reviews to other sites, and just summarize the main features:
- 2 bay 3.5" or 2.5" HDD or SSD
- Intel Celeron 2GHz Quad core; 2 GB DDR3 RAM
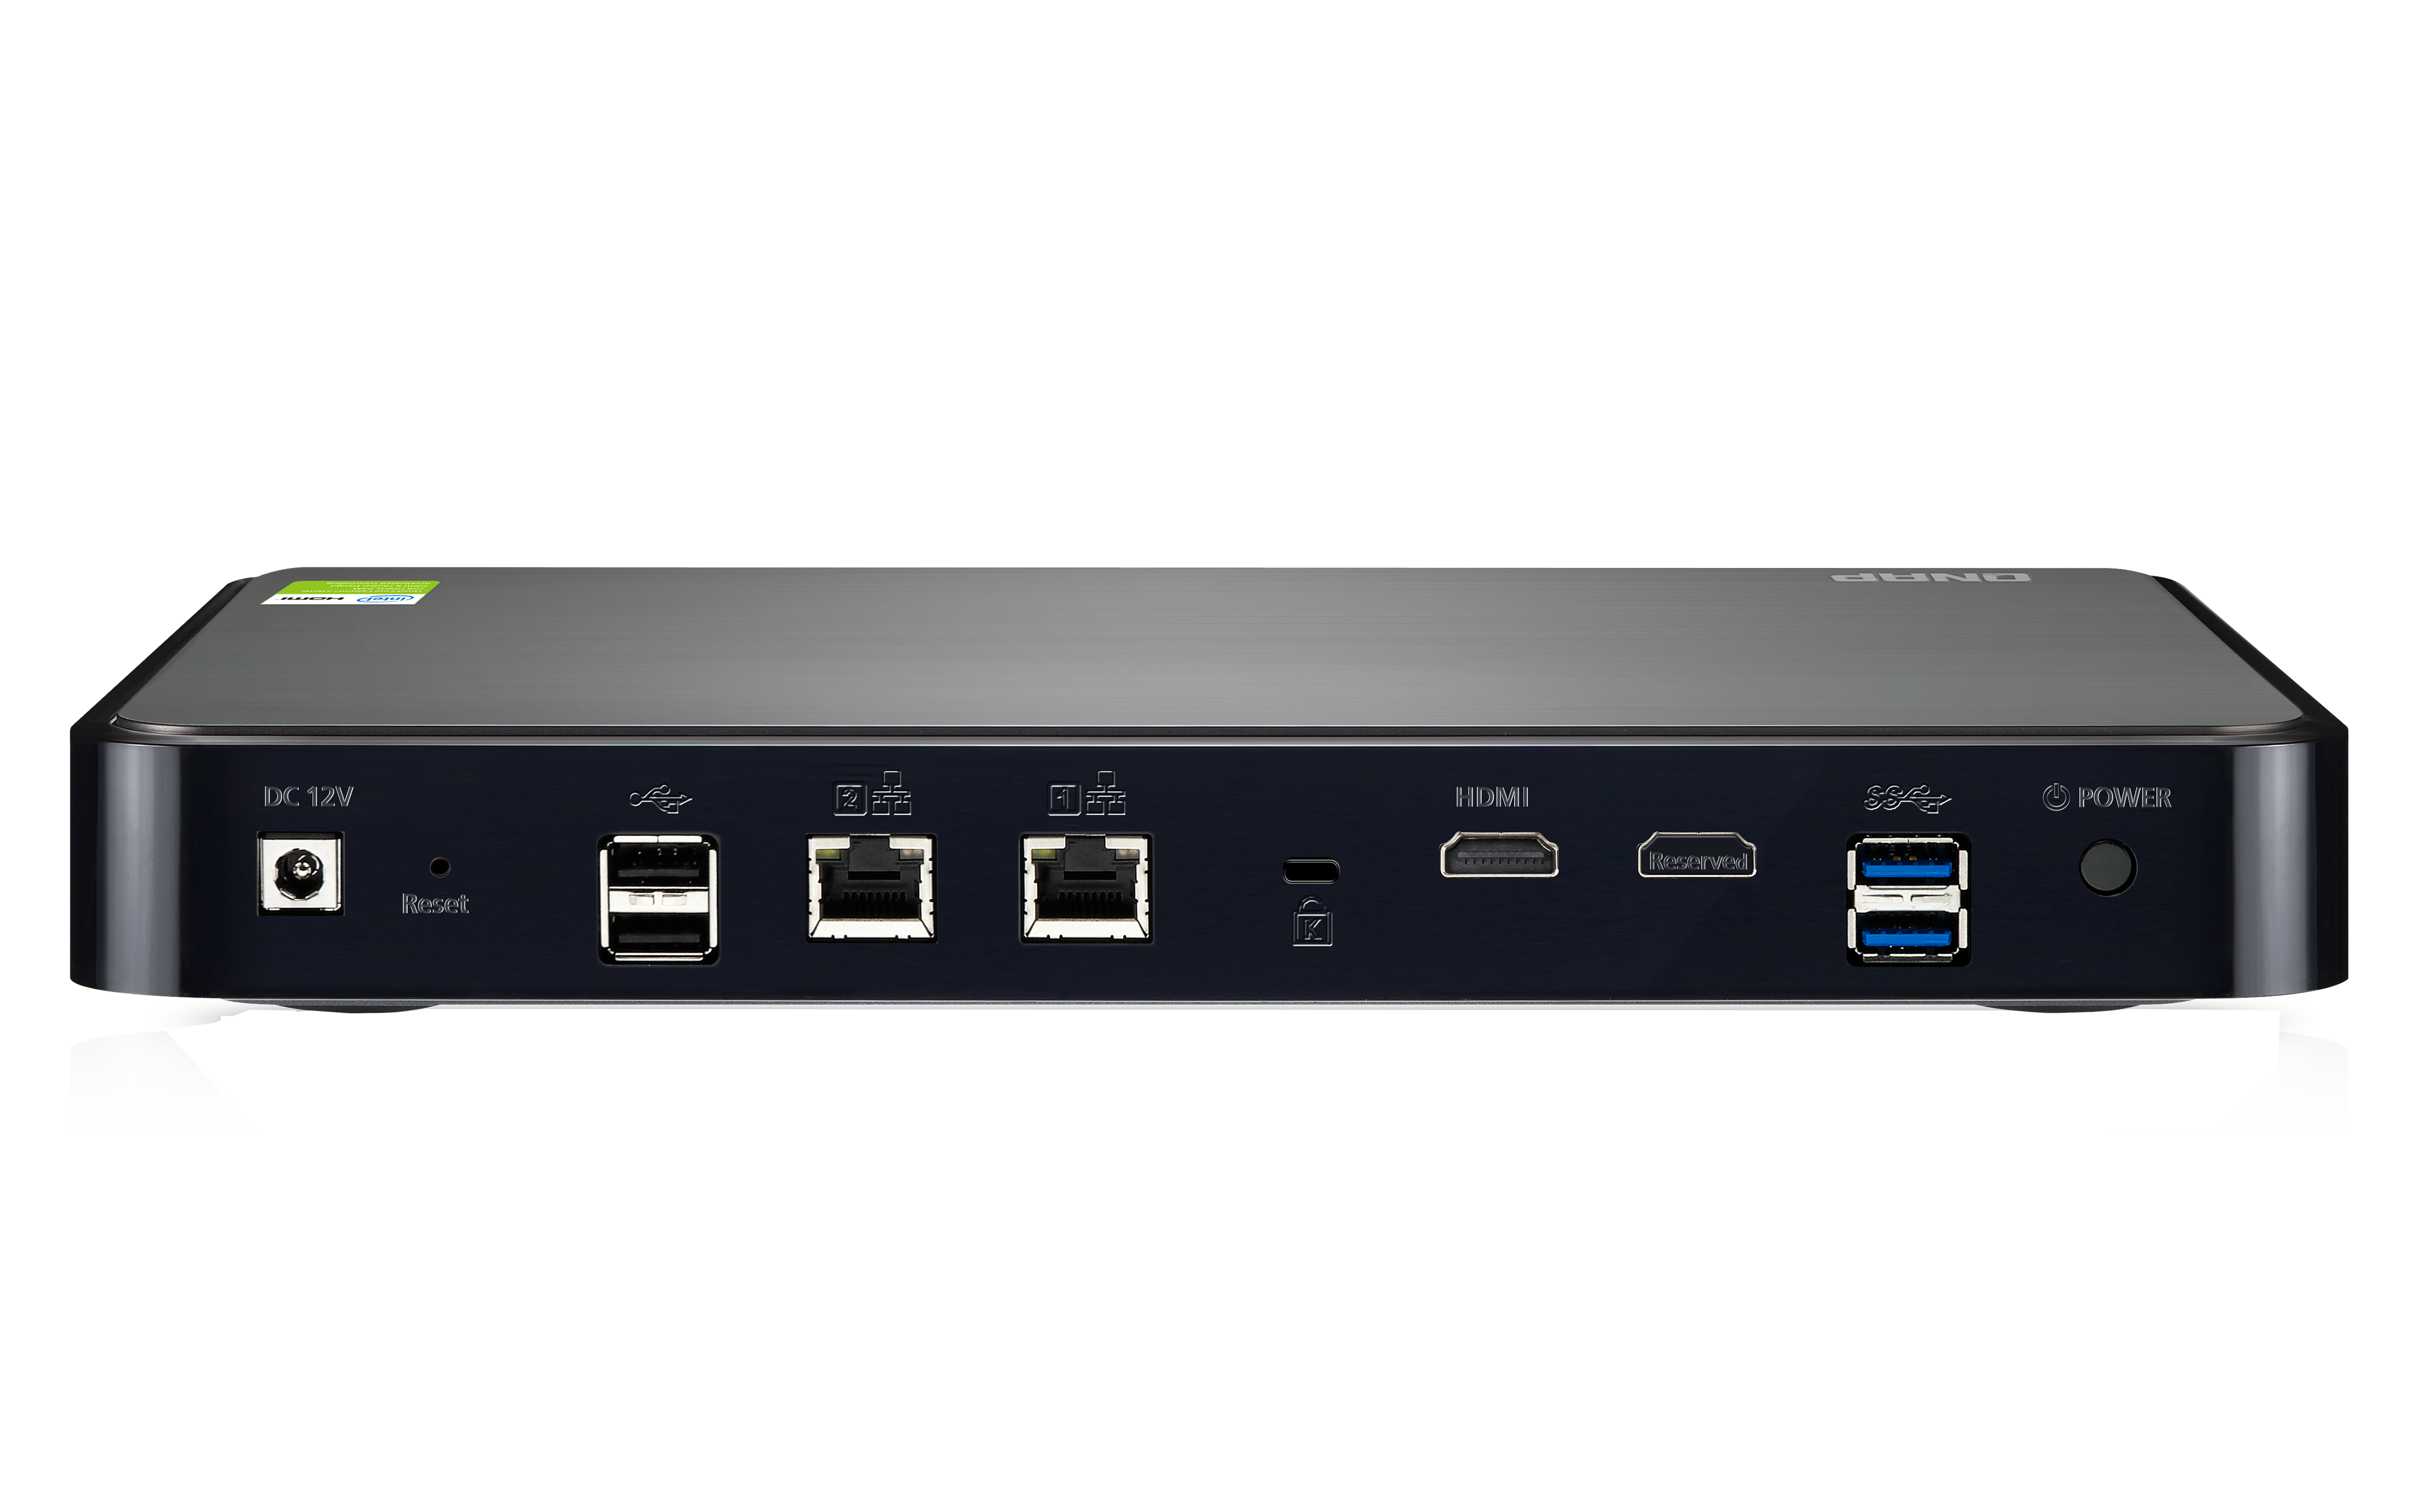
- 2x 1Gb RJ-45 ports; 2x USB 2.0; 2x USB 3.0
- 1x HDMI
- Fan-less
- Simple remote control
- Multiple in-house and external apps
- Good support for Kodi (aka. XBMC)
- Linux based 32-bit OS, with most common tools and network services available, including SSHD, NFS, SMB, FTPS, rsync.
NFS
Setting up NFS shares on the NAS side is straight forward through the web based UI under "Control Panel". You probably want to create one or more users which match your own client (e.g. laptop) user, and possibly also related group. All this can be achieved through the UI, however, for setting specific user IDs, SSH into the NAS (using the admin account) and edit /etc/passwd and /etc/group. If the IDs are changed, you'll also have to update /mnt/HDA_ROOT/.config/nfssetting.
/etc/passwd
david:x:1001:8008:Linux User,,david,:/share/homes/david:/bin/sh

john:x:1000:8008:Linux User,,john,:/share/homes/john:/bin/sh
/etc/group
foobar:x:8008:david,john
The reason for changing the user or group IDs manually might be to match existing IDs on the client machines. In that case, you might also have to provide this option, to make those IDs are actually used by the NAS. This setting is not permanent, so if the NAS is restarted frequently, you might consider a start-up script solution.
echo N > /sys/module/nfs/parameters/nfs4_disable_idmapping
The two relevant configuration files for the NFS setup on the NAS are /etc/exports and /mnt/HDA_ROOT/.config/nfssetting. They will be automatically configured by the UI, however some manual tweaking might be needed. I ended up with something like this, for two machines (with DNS names"laptop", "desktop" - you can also use IP address) and two shares ("pictures", "video"). The user (UID) and group (GID) ids will match what's seen in the /etc/passwd and /etc/group files above.
/etc/exports
"/share/CACHEDEV1_DATA/pictures" laptop(rw,async,no_subtree_check,insecure,no_root_squash) desktop(rw,async,no_subtree_check,insecure,no_root_squash)

"/share/CACHEDEV1_DATA/video" laptop(rw,async,no_subtree_check,insecure,no_root_squash) desktop(rw,async,no_subtree_check,insecure,no_root_squash)
/mnt/HDA_ROOT/.config/nfssetting
"/share/CACHEDEV1_DATA/Public" *(rw,async,no_root_squash,insecure)

[Global]

Version = 4.2.0

[Access]

/share/CACHEDEV1_DATA/Public = FALSE

/share/CACHEDEV1_DATA/pictures = TRUE

/share/CACHEDEV1_DATA/video = TRUE

[AllowIP]

/share/CACHEDEV1_DATA/Public = *

/share/CACHEDEV1_DATA/pictures = laptop,desktop

/share/CACHEDEV1_DATA/video = laptop,desktop

[Permission]

/share/CACHEDEV1_DATA/Public = rw

/share/CACHEDEV1_DATA/pictures = rw,rw

/share/CACHEDEV1_DATA/video = rw,rw

[SquashOption]

/share/CACHEDEV1_DATA/Public = no_root_squash

/share/CACHEDEV1_DATA/pictures = no_root_squash,no_root_squash

/share/CACHEDEV1_DATA/video = no_root_squash,no_root_squash

[AnonUID]

/share/CACHEDEV1_DATA/Public = 65534

/share/CACHEDEV1_DATA/pictures = 1001,1000

/share/CACHEDEV1_DATA/video = 1001,1000

[AnonGID]

/share/CACHEDEV1_DATA/Public = 65534

/share/CACHEDEV1_DATA/pictures = 8008,8008

/share/CACHEDEV1_DATA/video = 8008,8008
After making any changes to the NFS config, restart the service:
/etc/init.d/nfs restart
Client side and autofs
On the client, e.g. laptop or desktop, you'd want to point your NFS mount configuration to the shares created above. However, since either NAS or more likely personal machine will be rebooted, it is useful to configure this through autofs instead of the traditional /etc/fstab config. That way, the shares will be mounted and re-mounted on demand. It will also avoid long waits at boot and shutdown of the client machines.
First, make sure the NFS and autofs packages are installed:
apt-get install portmap nfs-common autofs cifs-utils
Edit /etc/auto.master and add the following line, which specify local mount point, and specific configuration files. Note that that has to match with your setup, so you might want to change the names here. As long as the /mnt directory and config file match, you can use whatever names you like.
/etc/auto.master
/mnt/qnap /etc/auto.qnap
The share specific configuration is then added in the file referenced above. It assumes you've named the shares on the NAS "pictures" and "video". It also assumes the DNS name of the NAS is "qnap" (or you can use an IP here). Finally, it assumes that the shared group is called "foobar", which should match the GID 8008 above. That GID should also be present on the client machine.
/etc/auto.qnap
pictures	 -fstype=nfs,rw,soft,tcp,nolock,gid=foobar	qnap:/pictures

video		 -fstype=nfs,rw,soft,tcp,nolock,gid=foobar	qnap:/video
Finally, after making changes to the NFS / autofs confg, restart the service:
/etc/init.d/autofs restart